This 3-ingredient depression era icebox cake is exactly the kind of “miracle dessert” my Grandma Rose swore by when money was tight. It’s built from simple pantry basics—graham crackers, heavy cream, and powdered sugar—but somehow turns into a pan of soft, creamy, layered goodness that disappears at every family gathering. The recipe comes from those leaner times when home cooks had to stretch ingredients and skip the oven, relying on the fridge to do the work.
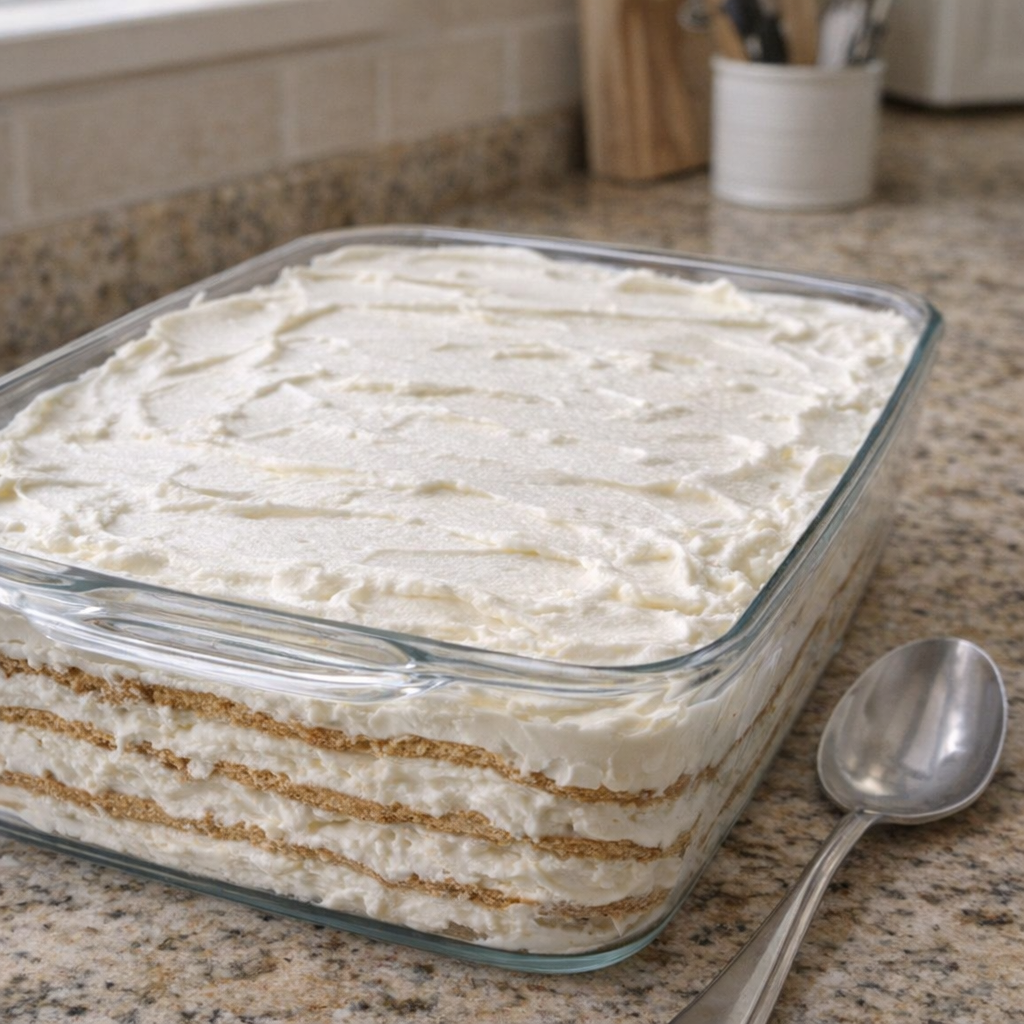
Glass dish of icebox cake on a kitchen counter
It’s perfect for busy weeks, potlucks, or those nights when you want something nostalgic and comforting without a big grocery run.
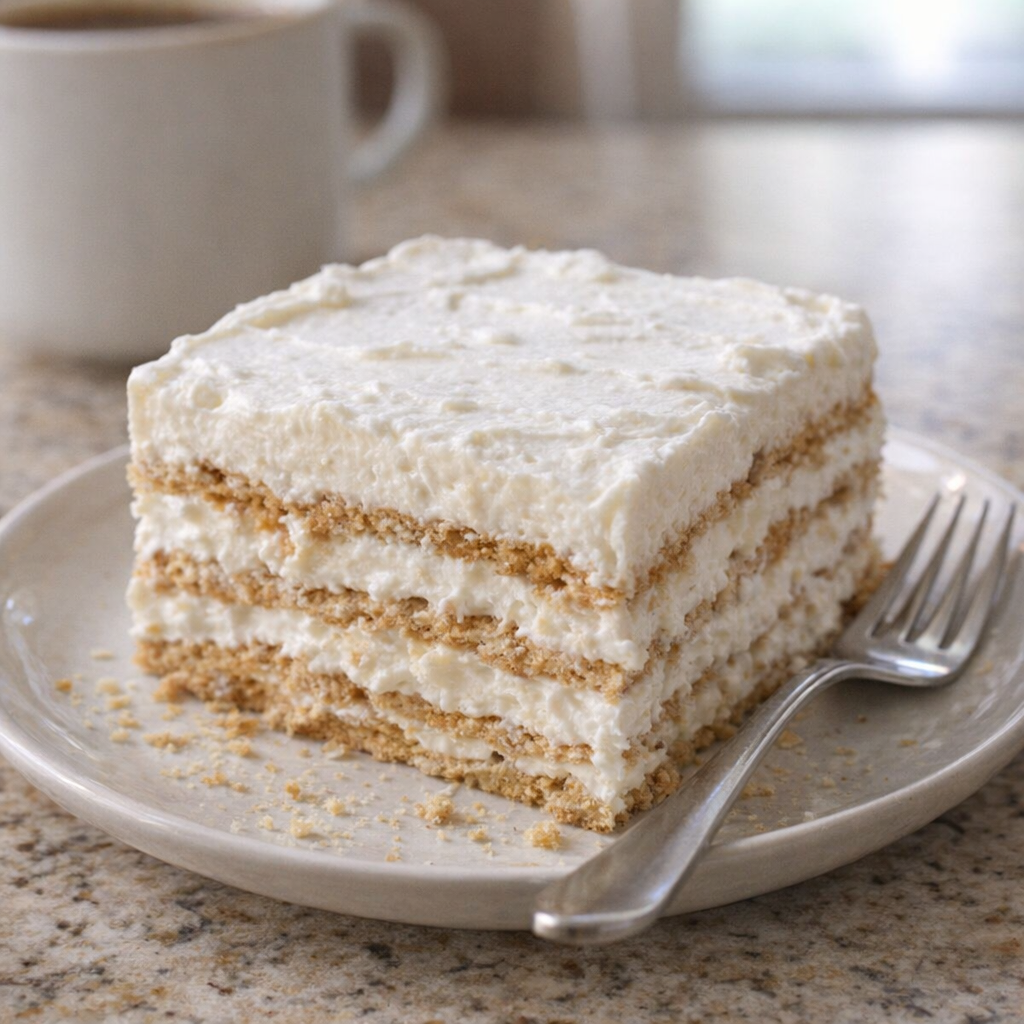
Serve this icebox cake well-chilled, straight from the rectangular glass casserole dish, with a spoon for scooping or a sharp knife for slicing neat squares. It pairs really nicely with hot coffee, black tea, or a cold glass of milk. For a little contrast, you can add fresh berries or sliced bananas on the side, but honestly it holds its own as a standalone dessert.
It’s also a great make-ahead option for family reunions, game nights, or casual dinners—just park it in the fridge next to whatever you’re serving, from grilled burgers to Sunday pot roast, and let everyone help themselves.
3-Ingredient Depression Era Icebox Cake
Servings: 9-12
Ingredients
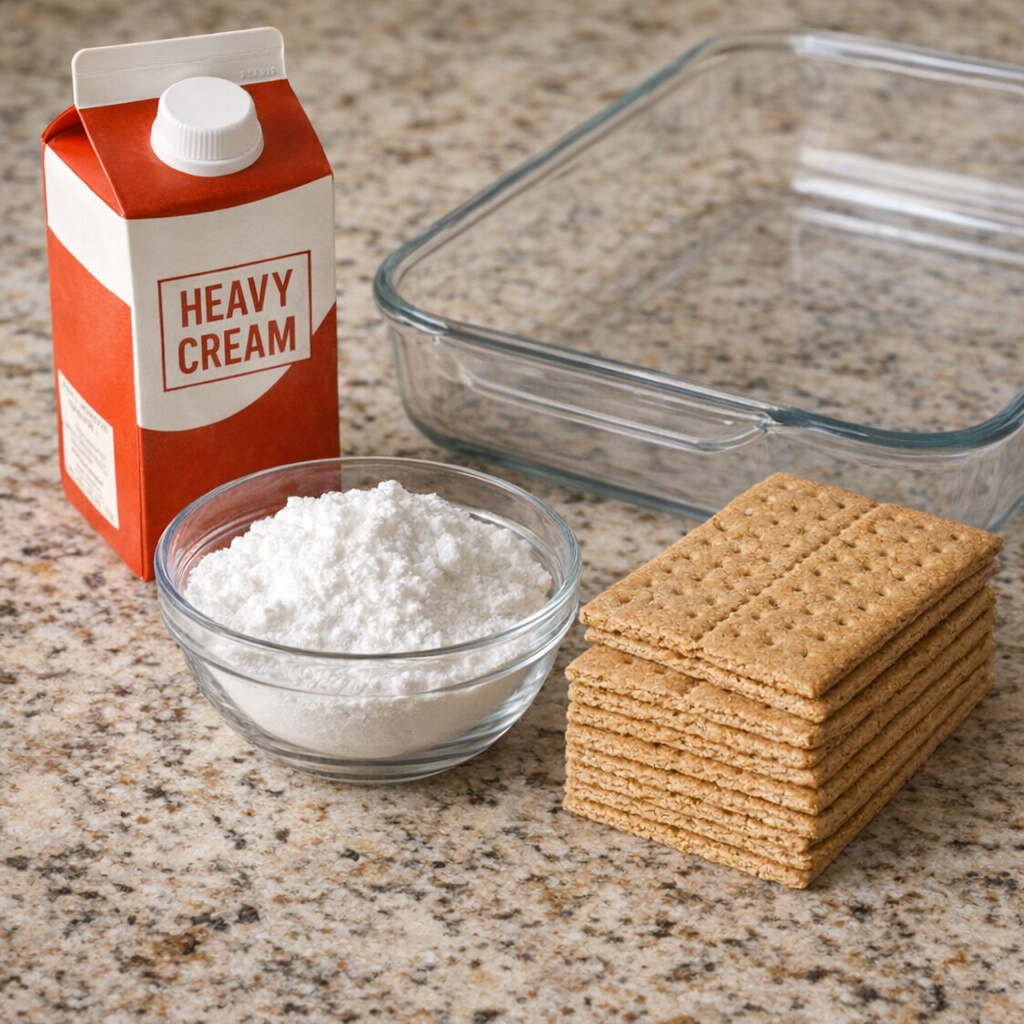
3 cups cold heavy cream
3/4 cup powdered sugar, plus more if needed to taste
1 (14–16 ounce) box graham crackers (about 3 sleeves)
Directions
Clear space in your refrigerator for a rectangular glass casserole dish (about 9×13 inches) so it can sit flat while the cake chills and sets.
Simple ingredients for icebox cake on countertop
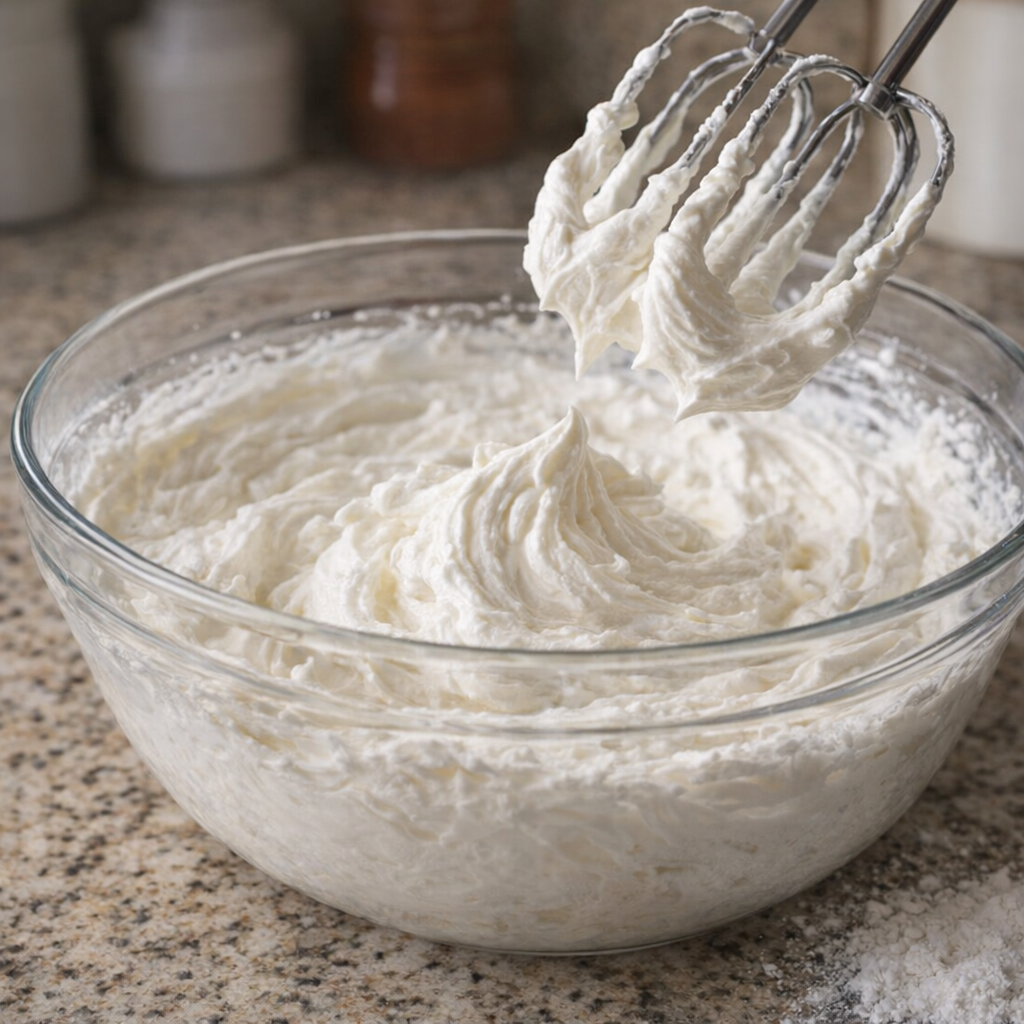
In a large mixing bowl, pour in the cold heavy cream. Using a hand mixer, stand mixer, or a sturdy whisk, begin whipping the cream on medium speed until it starts to thicken and soft peaks begin to form.
Add the powdered sugar to the partially whipped cream and continue whipping until medium to firm peaks form. The whipped cream should be thick enough to hold its shape but still spreadable. Taste and add an extra tablespoon or two of powdered sugar if you like it a bit sweeter, then whip briefly to combine.
Whipped cream forming soft peaks in mixing bowl
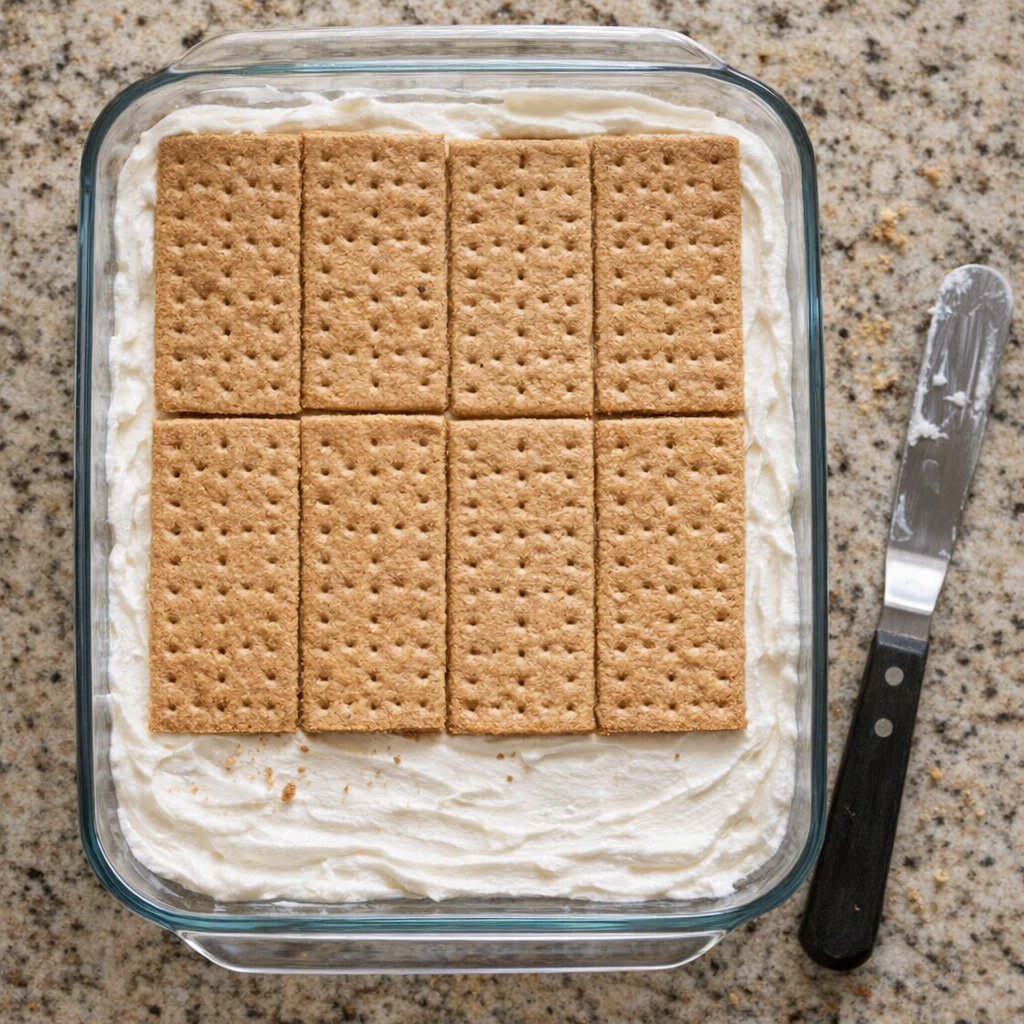
Spread a thin layer of whipped cream over the bottom of the clean rectangular glass casserole dish. This helps the first layer of graham crackers stay in place.
Arrange a single layer of graham crackers over the whipped cream, breaking pieces as needed so they fit snugly and cover the bottom of the dish from edge to edge.
First layer of graham crackers in glass baking dish
Spread a generous layer of whipped cream over the graham crackers, using an offset spatula or the back of a spoon to smooth it out and cover all the cracker edges. Aim for about 1/2 inch of cream.
Repeat the layers: graham crackers, then whipped cream, building up the cake until you’ve used nearly all the whipped cream. Try to end with a final thick layer of whipped cream on top so you get that soft, creamy finish. You should have multiple visible layers when sliced.
Gently cover the dish with plastic wrap or a lid, making sure it doesn’t press directly into the top cream layer if possible.
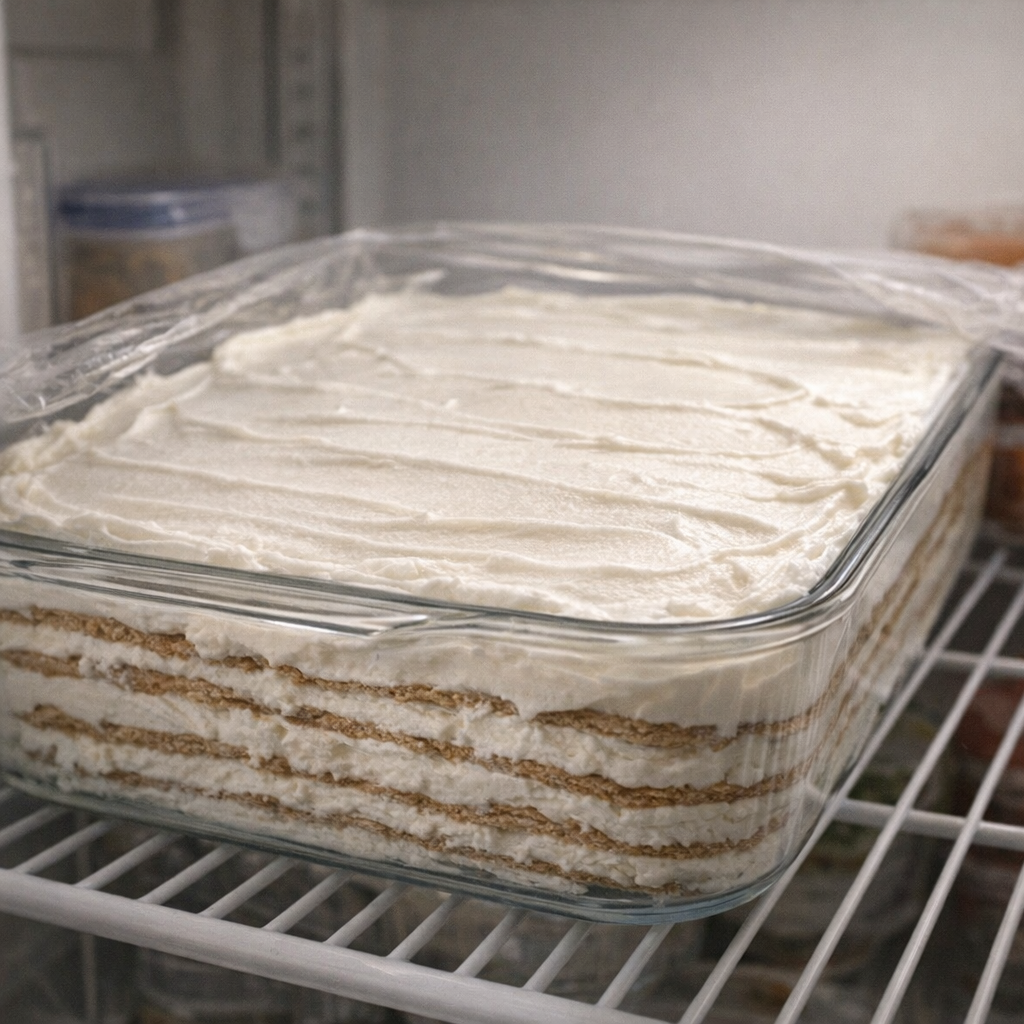
Layered icebox cake ready to chill in refrigerator
Refrigerate the icebox cake for at least 6 hours, but overnight (8–12 hours) is best. During this time, the graham crackers will soften and meld with the whipped cream, turning into cake-like layers.
When ready to serve, remove the plastic wrap, and if you’d like, sprinkle a tiny bit of crushed graham cracker on top for texture using any leftover pieces. Slice into squares directly in the glass dish and serve cold. Store any leftovers covered in the refrigerator and enjoy within 2–3 days.
Variations & Tips
Slice of icebox cake served on a small plate
To stretch this dessert even further, you can use slightly less whipped cream per layer and add more graham crackers, which is very true to its depression era roots.
For a hint of flavor without adding new ingredients, toast the graham crackers briefly in a low oven before layering so they develop a deeper, nuttier taste (let them cool completely before using so they don’t melt the cream). You can also fold a little extra powdered sugar into just the top portion of whipped cream to create a slightly sweeter top layer, mimicking a light frosting.
If you have cocoa powder on hand, sifting a teaspoon or two into the powdered sugar before whipping creates a subtle chocolate version without changing the basic structure. For a sturdier cake that holds up longer at room temperature, whip the cream to firm peaks but stop before it looks grainy; over-whipped cream can separate and weep.
Always keep the cake refrigerated until serving, and don’t leave it out at room temperature for more than 2 hours (or 1 hour if your kitchen is very warm), since it’s made with fresh dairy. Use pasteurized heavy cream, keep all utensils and the dish clean, and promptly return leftovers to the fridge to keep the dessert safe and fresh.